DIY Wish House to Supercharge Your Hopes and Dreams

I’m wishing…

Here in the northern hemisphere, the days get shorter and shorter, the nights get colder and colder, and sometimes we need a bit of help to to honor and respect the cold, dark, and stillness. This year, in particular, winter is conjuring thoughts of Persephone, stuck in the underworld, living with Hades. There seem to be more reasons than usual to feel discouraged and maybe downright blue. So what better time to create a healing tool to bring focus on your aspirations: hopes, dreams, affirmations, resolutions…wishes!

And that’s just what the Wish House is for.

What’s a Wish House?
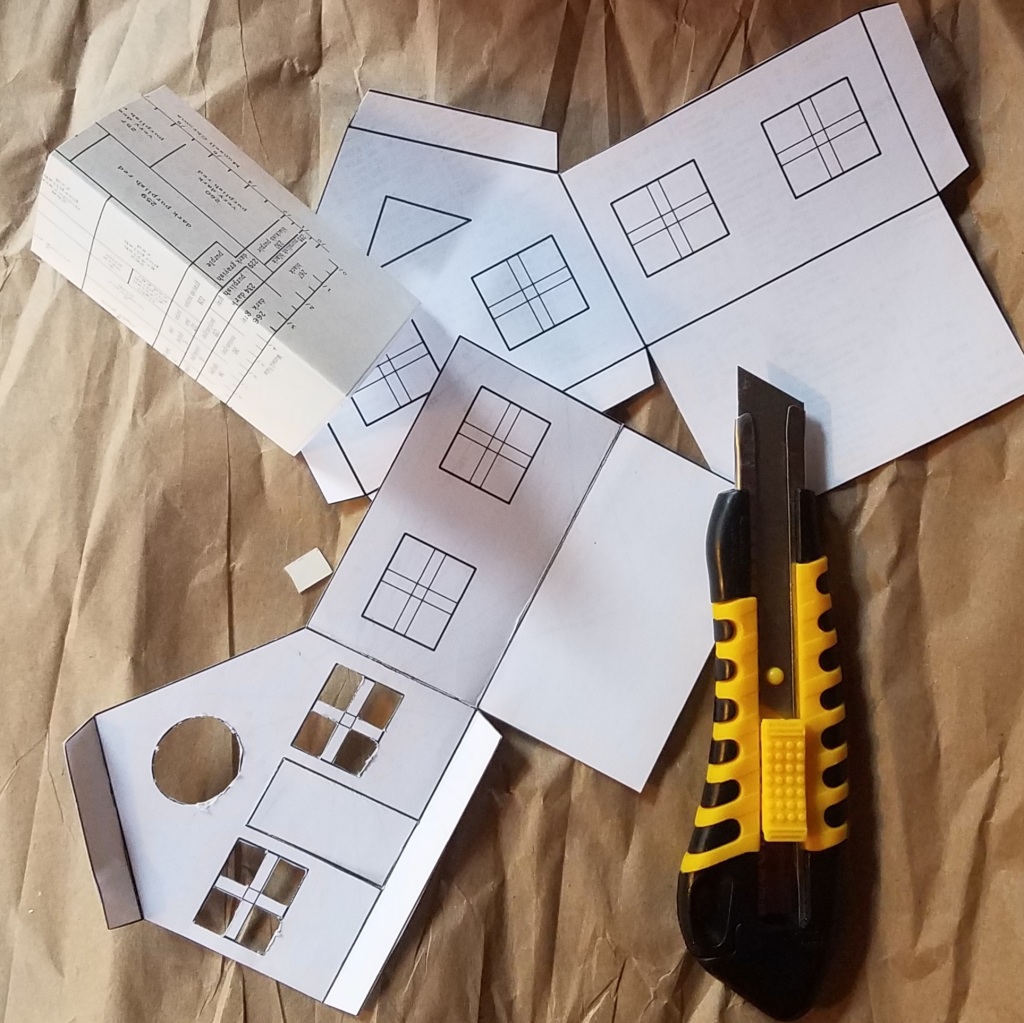
It’s a simple paper construction that you make yourself. It might be for you to use, or it might be something you want to give to someone you care for. It’s designed to clarify and focus your good wishes, hopes, aspirations, even your yearnings.

How does it work?

Let’s cut to the chase: a wish house is a magical object. It follows the same principles as the 70s-era pyramids, made to concentrate energies. We don’t know how the magic works, if it works, or if the magic is you as you make it and use it.

Nonetheless, I’m happy to share the pattern and method for making and using a wish house. As far as I can tell, the magic begins when you decide to make one. It begins to clarify and focus as soon as you start to step through the process.
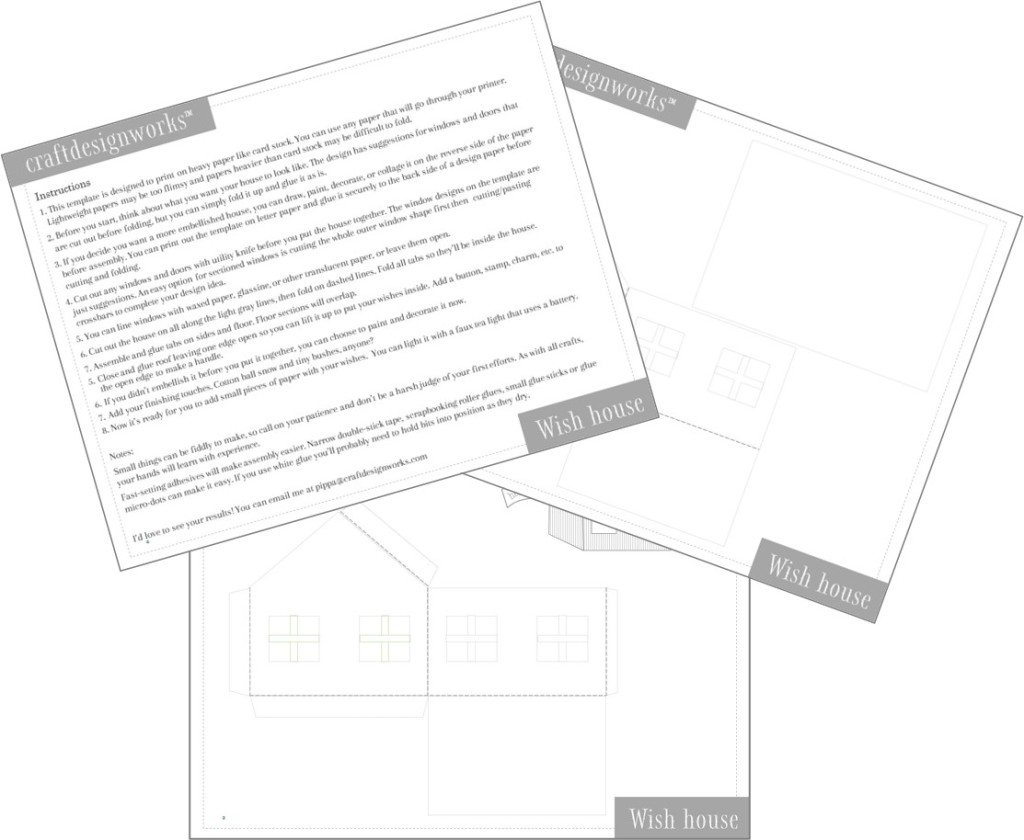
Here are the elements you can personalize so you can fully power up your wish house:

1 – Intention

First, you can clarify the intention. Are you making something for yourself or for someone else? Pause for a moment and see the power you want to invoke, the changes you’d like it to bring. My wish house for 2022 welcomed vision and transformation with a golden butterfly and an antique hand. My wish house for the new year of 2023 invited right brain/left brain interplay. What sounds right for your life?

2 – Exterior

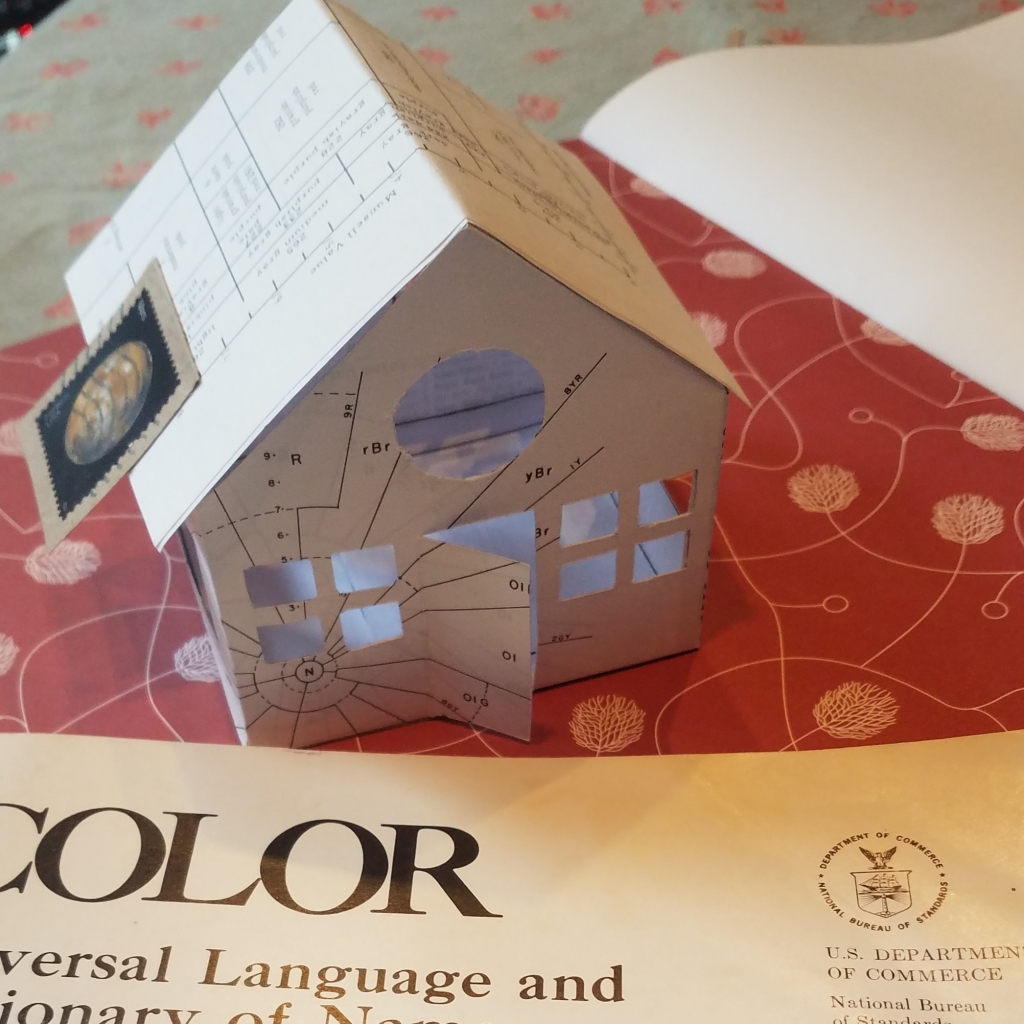
What will you make it out of? Old books, letters, copies of family photos, flags, drawings? For 2023 I used a book that had been discarded from our library, full of very technical information and data about color. I liked that it combined left brain and right brain content in one place.
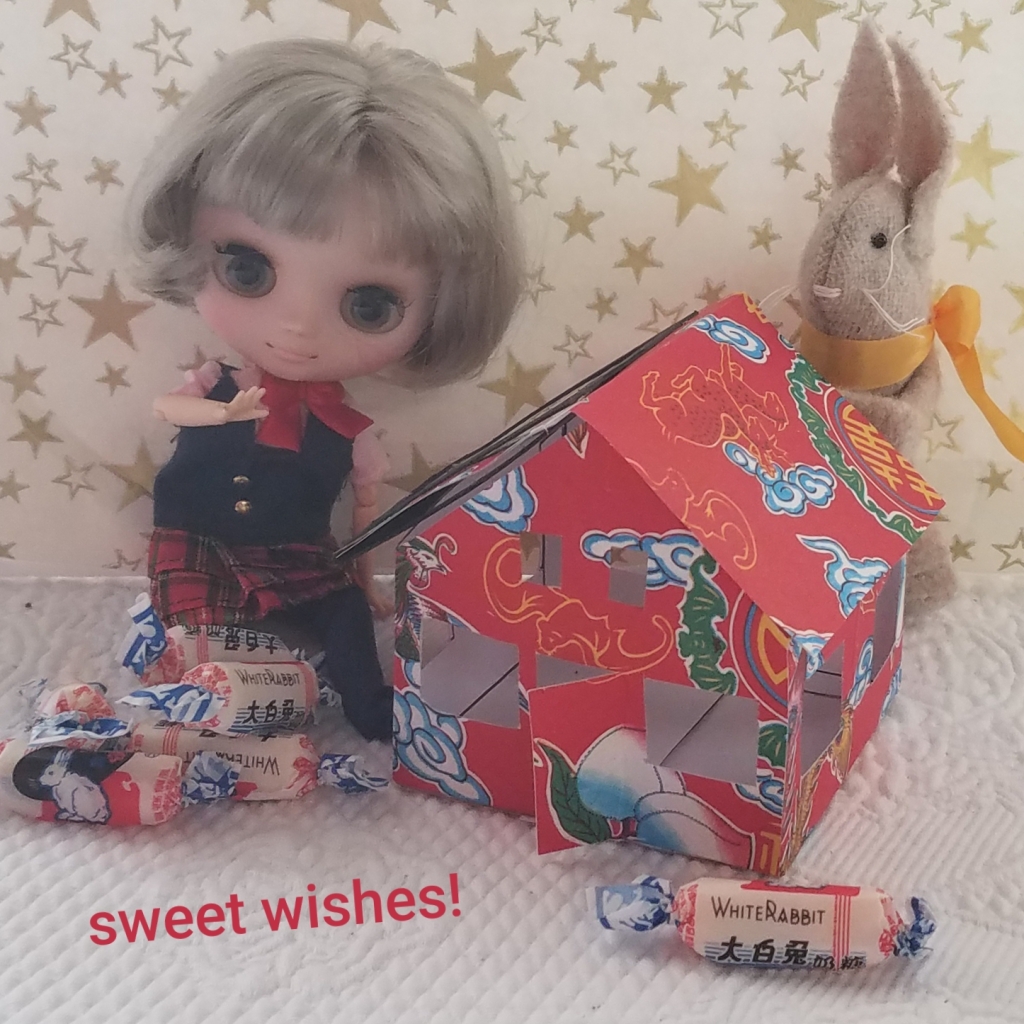
For the Year of the Rabbit, I used Asian red wrapping paper covered in auspicious symbols.
3 – Windows? Doors?

What openings will your house have? What kind of windows do you want to make? Will they be open and empty, made of waxed paper, cellophane or glassine? Will you fill them with images that resonate with your wishes?

4 – Roof and closure
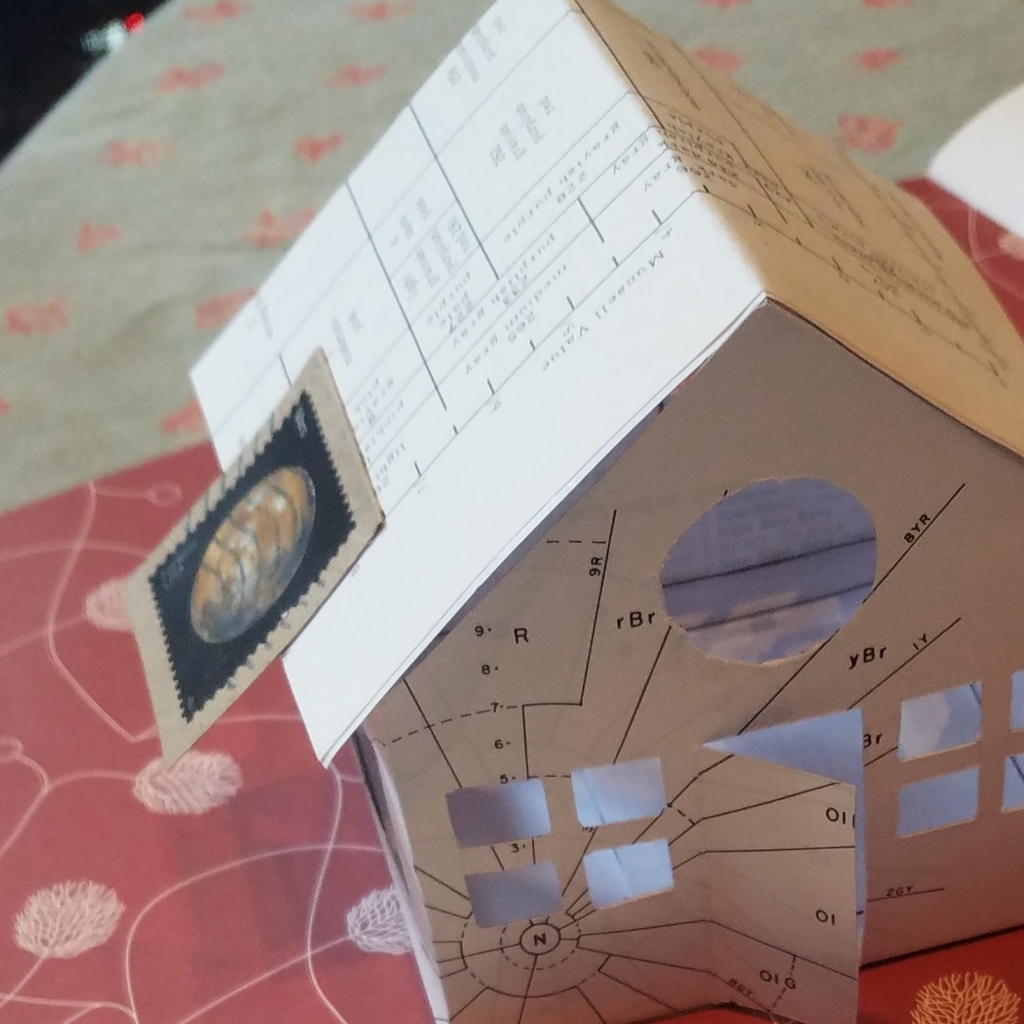
How will the wishes get in? The pattern is designed for one side of the roof to lift open. I like to choose a special image to be the roof handle, so every time I open or close it I’m reminded of the meaning.

5 – Illuminate

To make it glow, you can put a flameless tea light in inside it. Since it’s made of paper, I don’t recommend using an actual candle, unless it’s safely resting inside your fireplace or outdoors, where you won’t create a disaster instead of furthering your wishes.

6 – The wishes

The wishes can be simple slips of paper with the wishes written on them or small objects you find meaningful. For example, If you have healing wishes for someone far away (or someone who’s passed to the other side), you could slip a small photo into your wish house. Or your wish house can be a home for your current affirmations.

7 – Ritual

My ritual is simple. When I’m so moved, I write things on slips of paper and put them into the house while thinking about them. I let them build up over the year. On New Year’s Eve, with a fire in my fireplace, I burn them one at a time, releasing their energies as I think about how they’ve manifested in my life. Or maybe that I need to bring the same wish forward into the new year. Do whatever makes sense for you.

8 – Sharing

If you’ve made it as a gift, have fun and use your imagination wrapping it up for the recipient. Maybe even start them off with a wish or two.

If you want to send it but don’t want to deal with finding the right box to house it as it travels, you have 2 other options: cut and fold it so it fits into a 5×7 envelope with the instructions for putting it together; or send the 3 pages, unfolded, in a 9×12 envelope for the recipient to construct themselves.
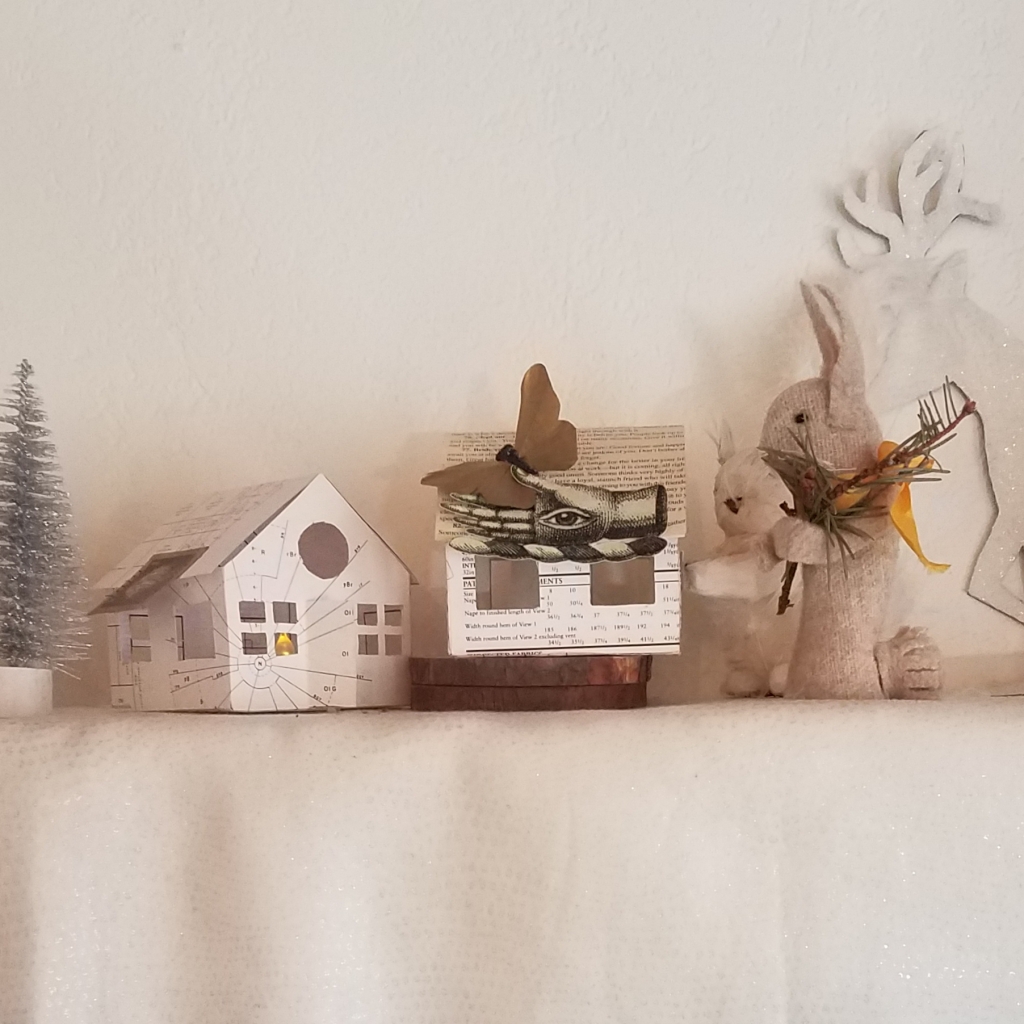
I hope you’ll feel a bit cheered, and maybe inspired, at the idea of a wish house to invite and strengthen energies in your life. I do believe we cannot afford to despair right now. Magnifying hopes and dreams is an important affirmation of their power. My wish house for 2024 will be powering up my wishes for the world to hold more compassion, understanding, and peace as we move forward. Onward!

Please let me know if you make one!

Little Witch Costume Tutorial

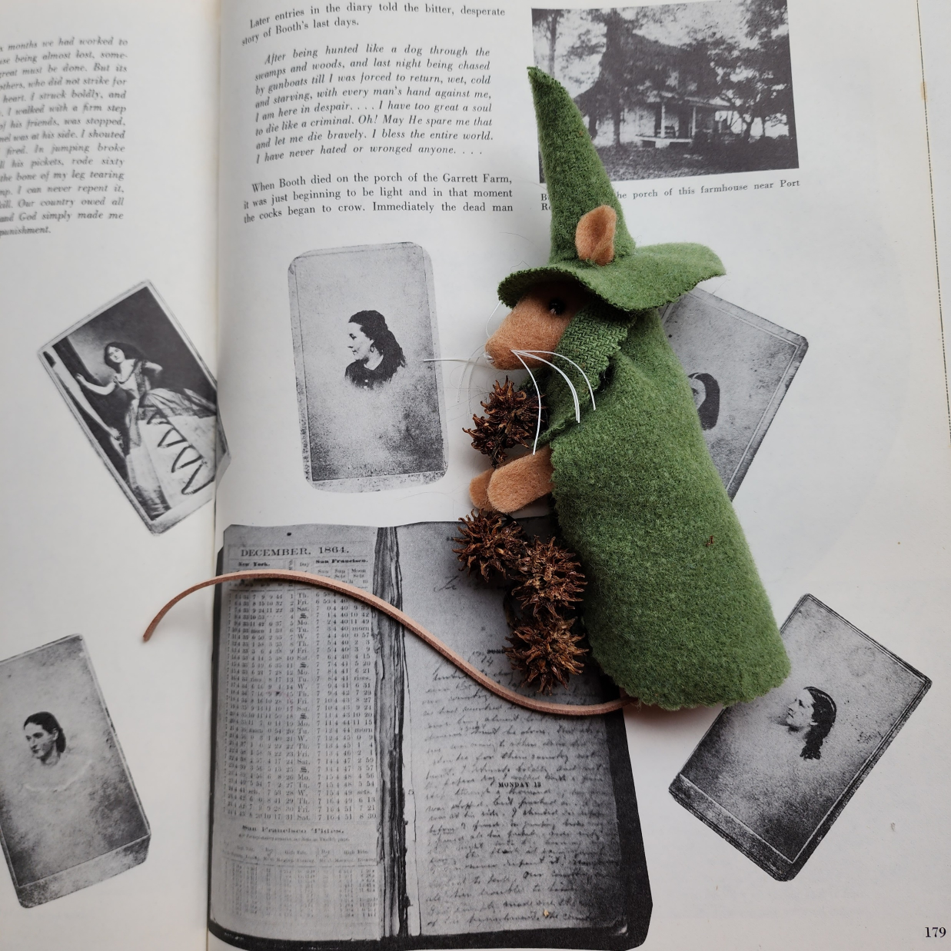
An easy costume to dress up your little mouse, rabbit, or pig for Halloween or anytime you need a witch in your cast of characters. This one is a green witch, a little earth witch. I’m pretty sure she specializes in plants and herbal magics.

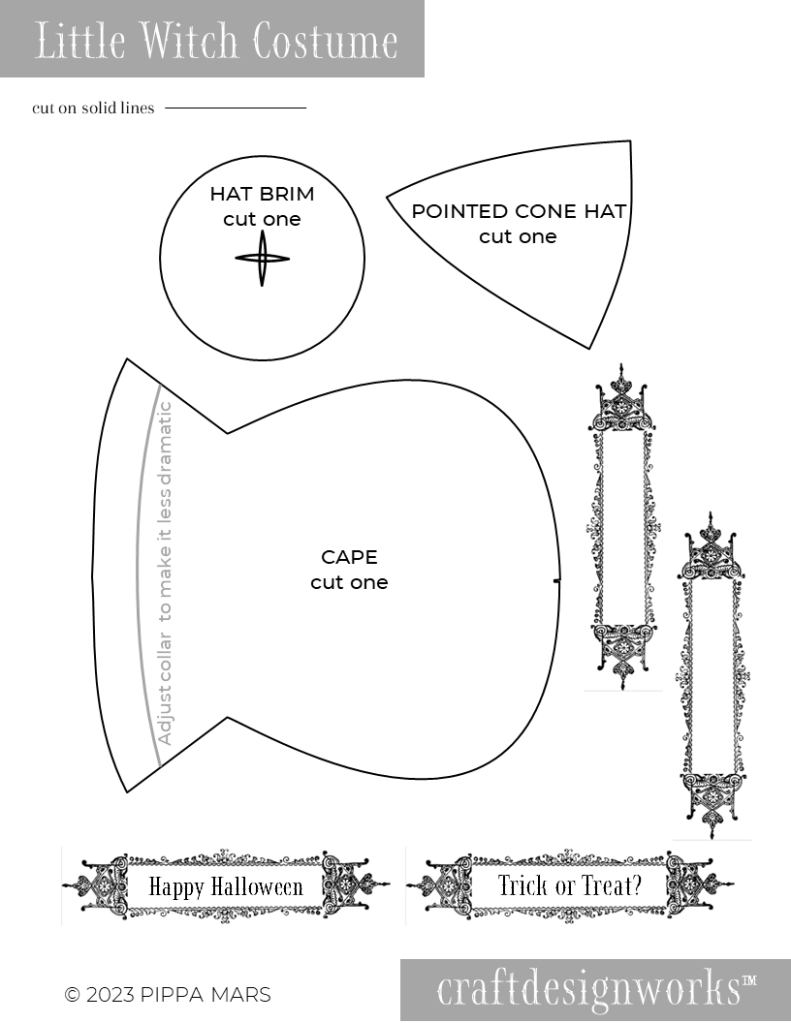
Start by downloading the free pattern here.

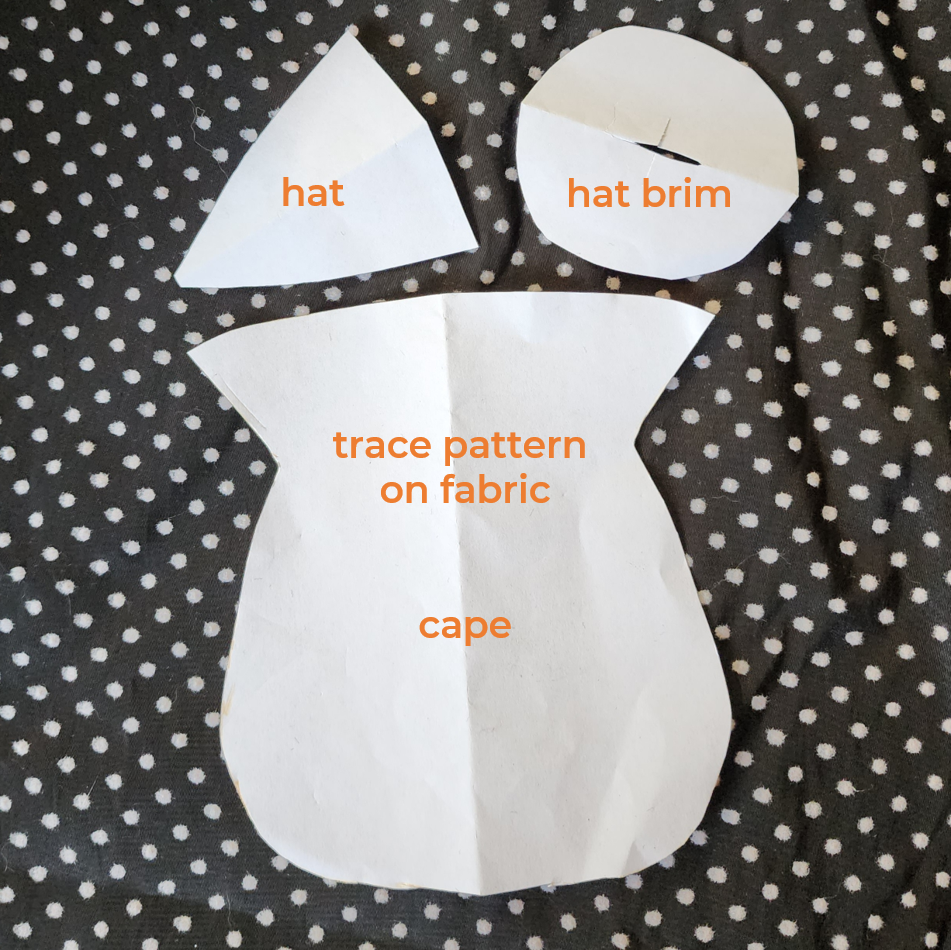
Trace the outlines of the 3 pattern pieces onto your fabric with chalk, crayon, or pen, depending on what will show up best.

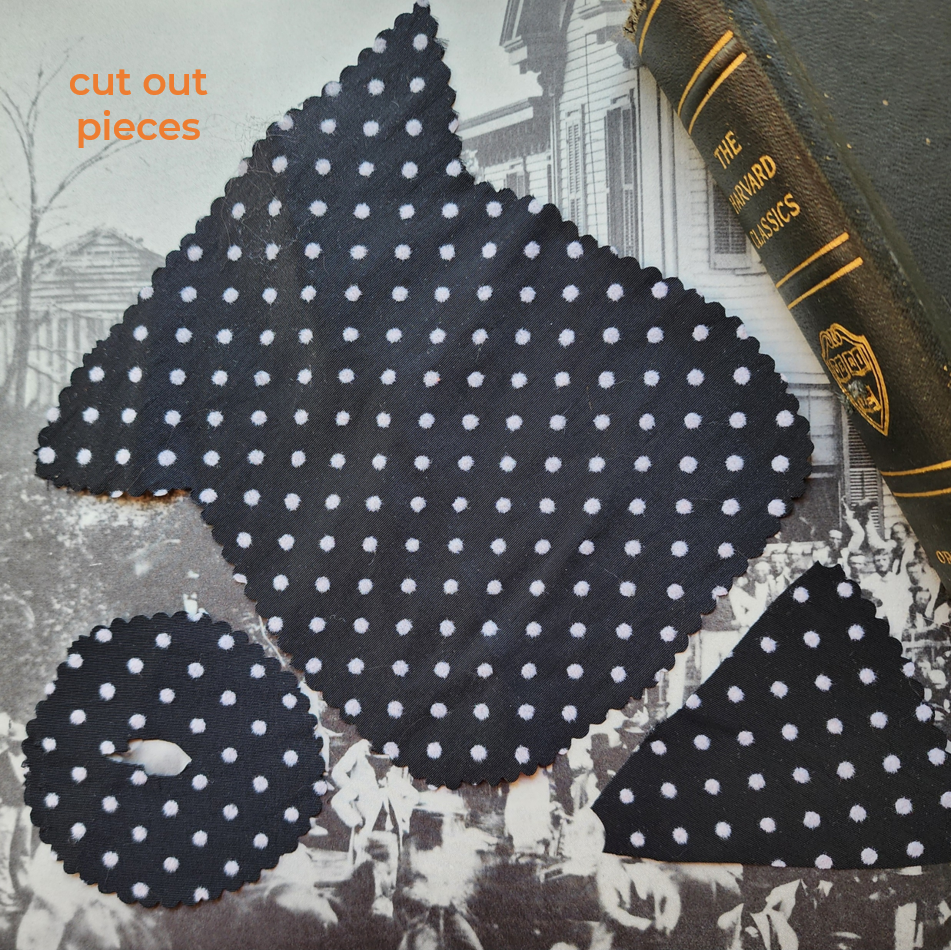
Cut out the pieces. If you have scissors that make fancy edges, they can be fun to use for this costume.

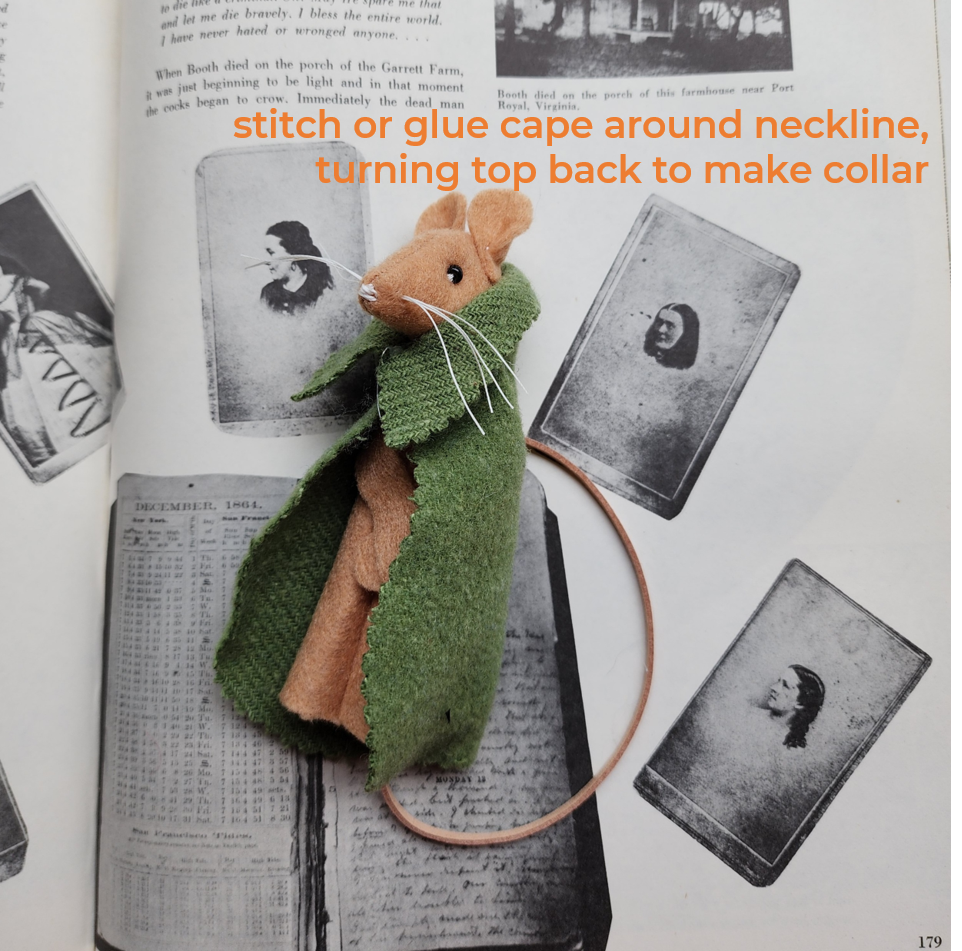
I’ve switched to the green fabric I used for this witch. The next step is to fasten the cape around the character’s neck. The pattern has an exaggerated collar shape that you can trim down if you don’t want the collar to be so dramatic.

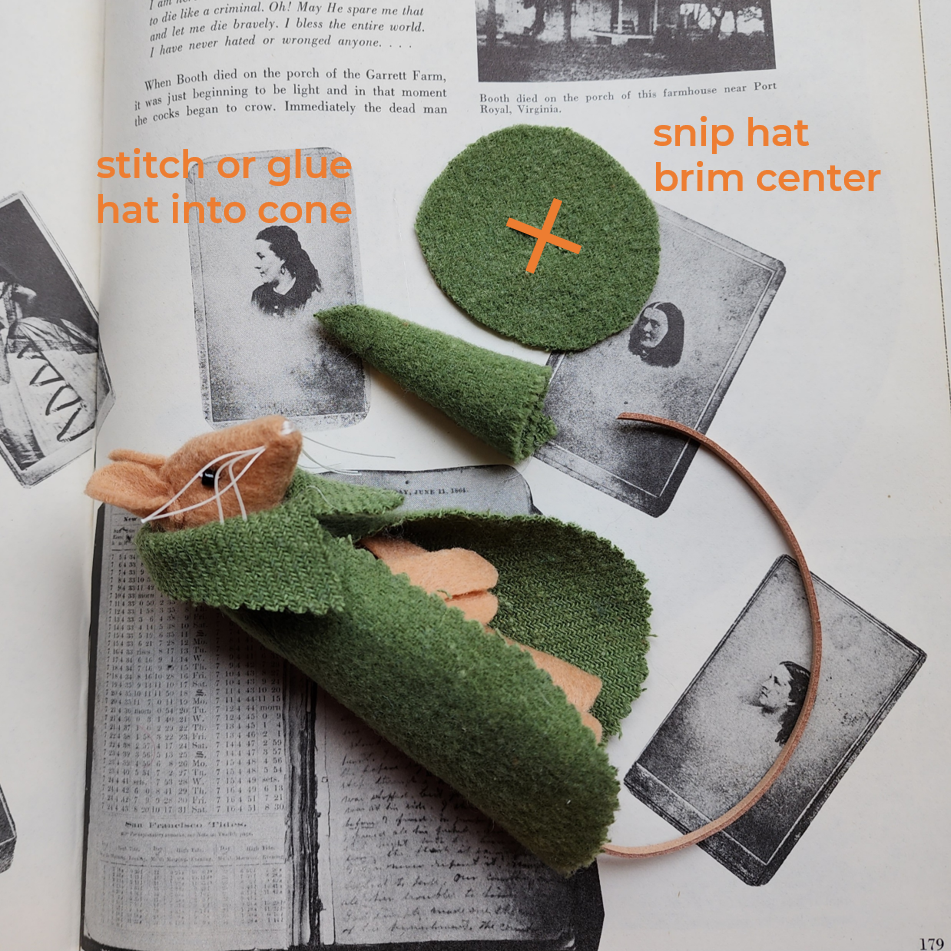
Prep the hat sections. Glue or stitch the cone shape for the pointy part of the hat. Make an x-shaped slit in the middle of the brim section.

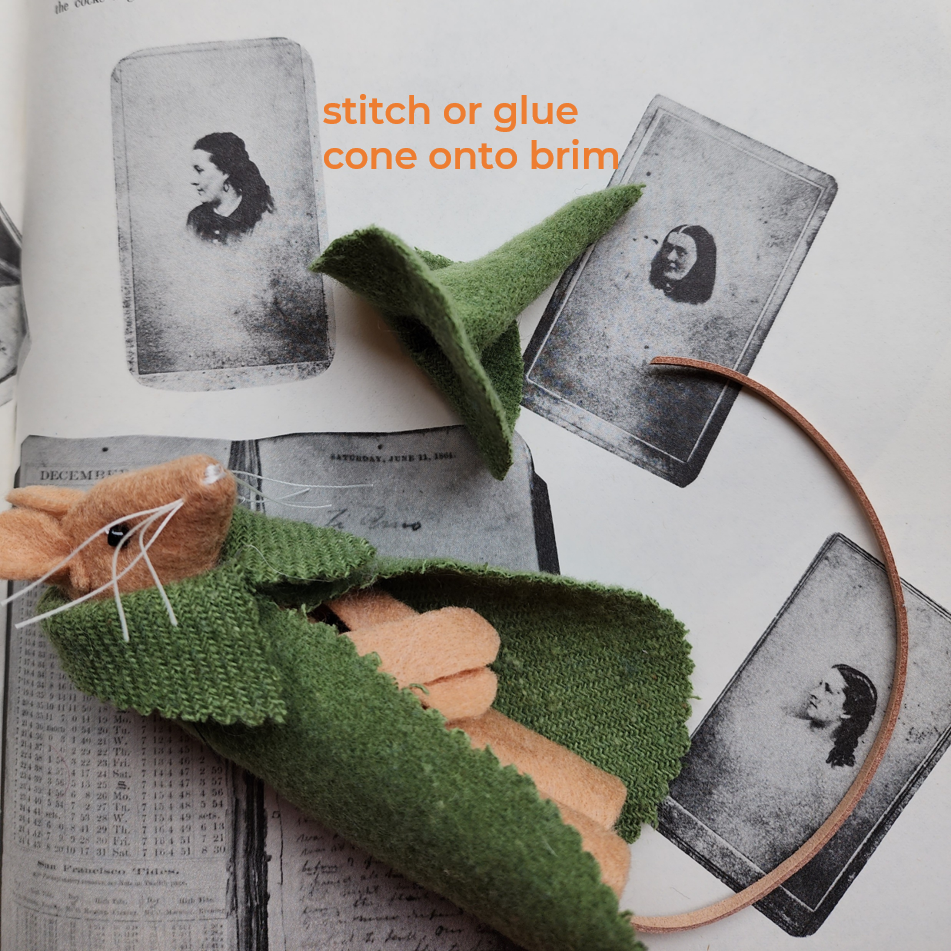
Stitch or glue the cone onto the brim, leaving the bottom of the cone open around the x-shaped slit so you can do the next step.

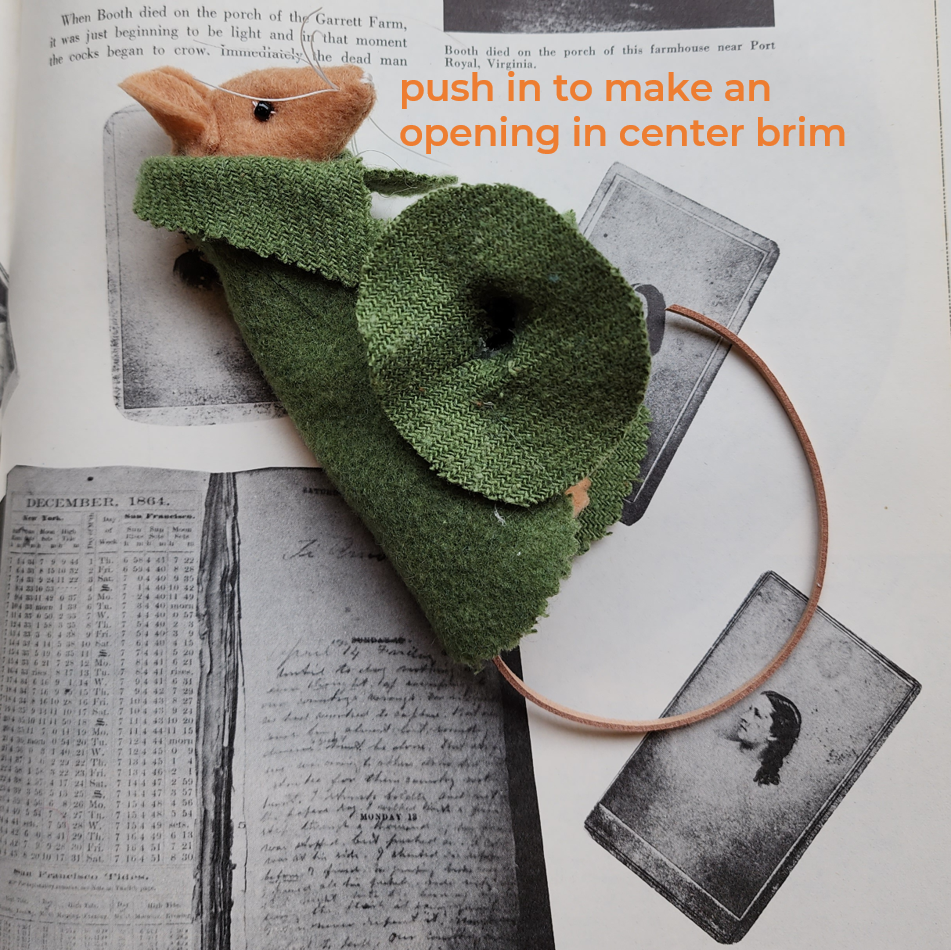
Push your finger into the middle of the hat, so you’ll be able to put the hat onto the animal’s head.

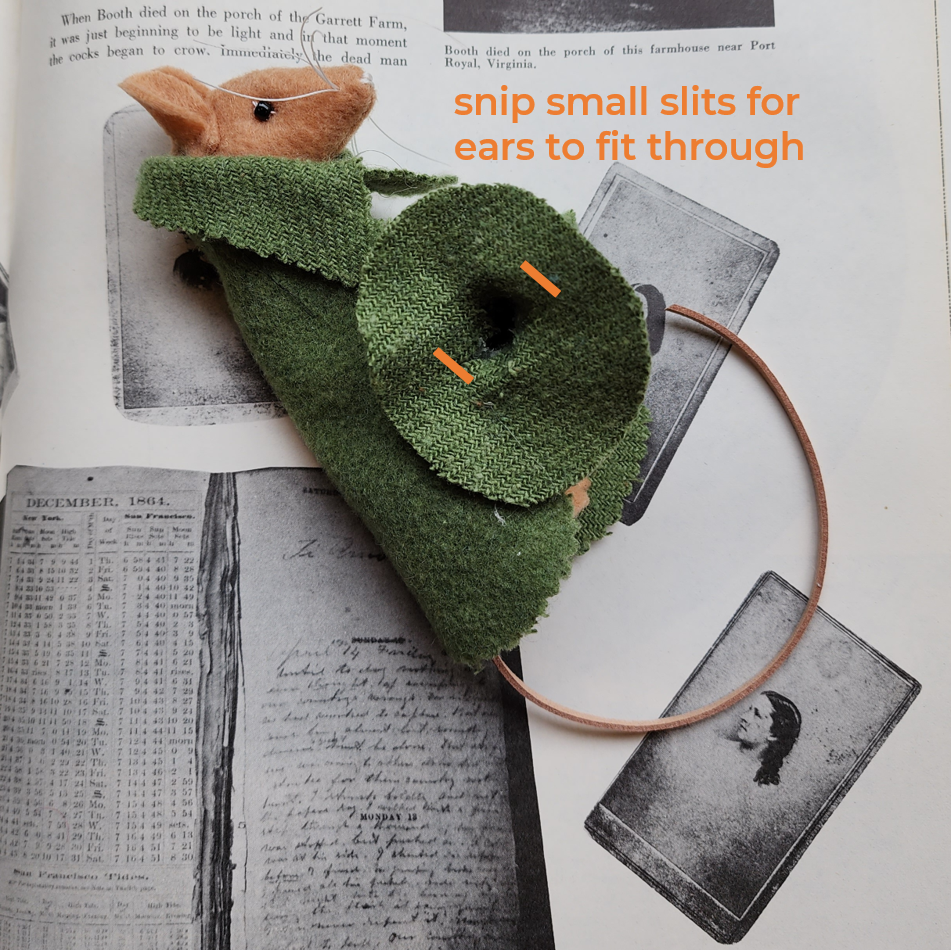
Snip a small slit through the brim on either side of the middle of the hat. This will let you slip the character’s ears through the brim.

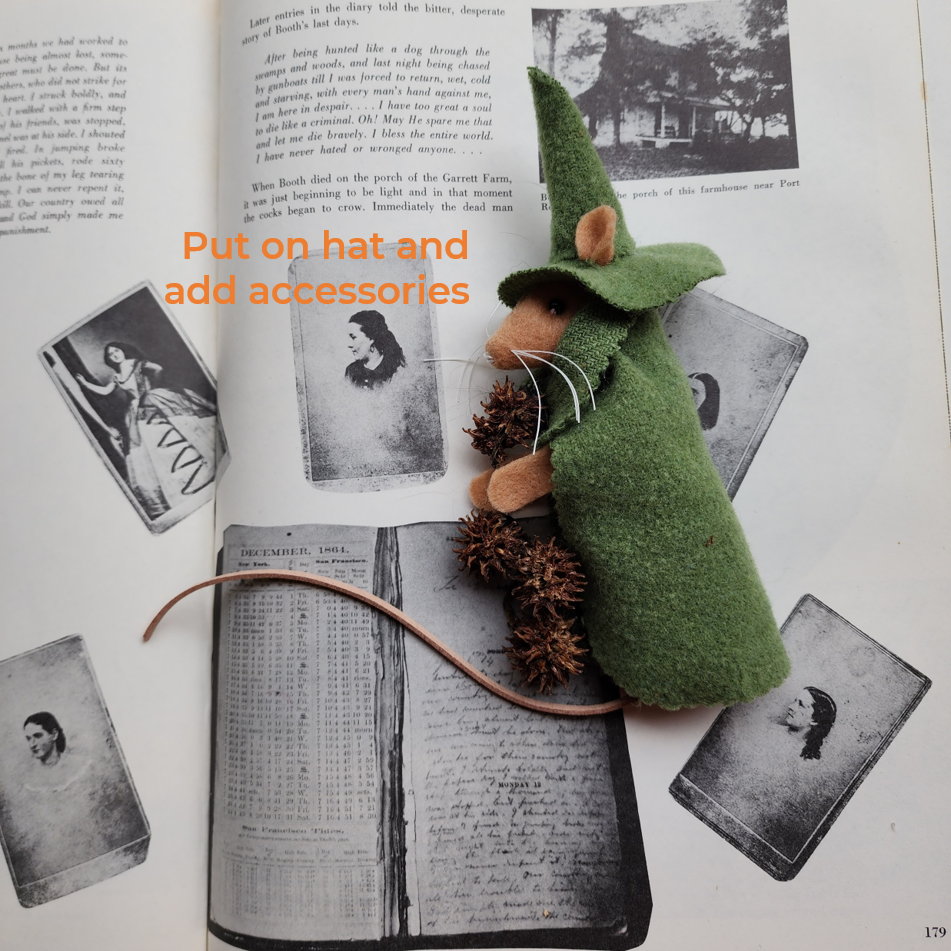
Wiggle the animal’s ears through the slits. The costume is done. Now you can add whatever accessories you like to complete the look.

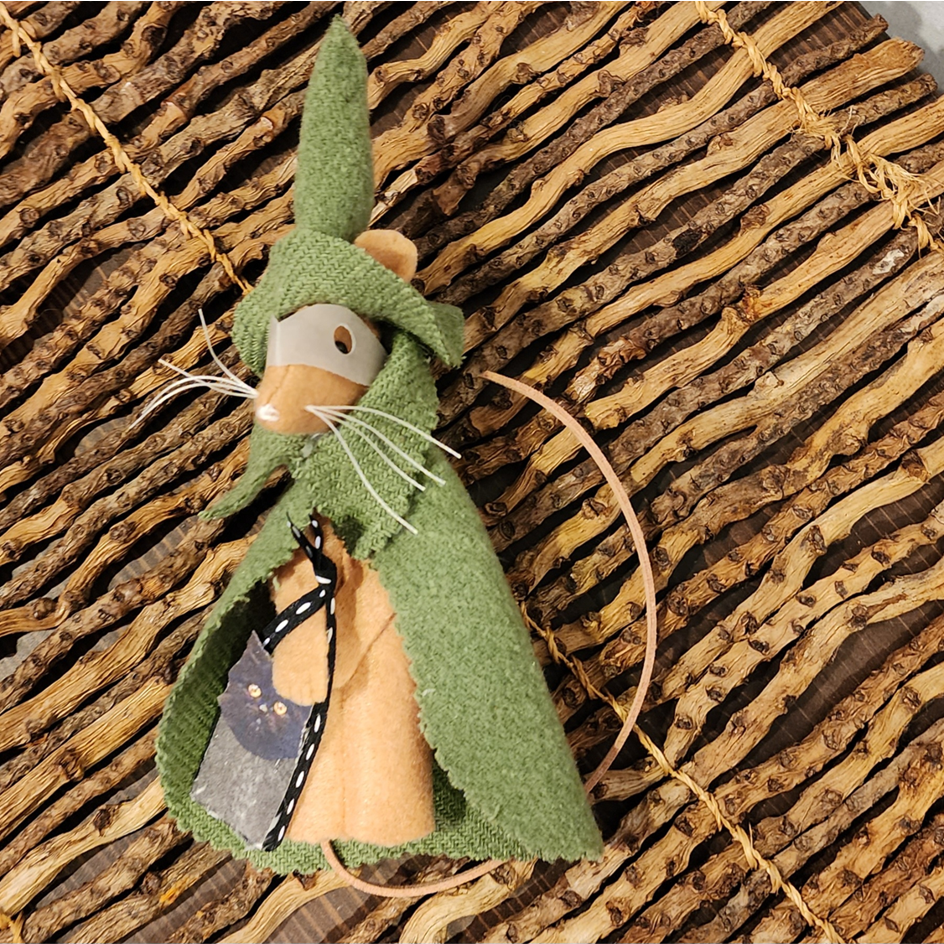
This little green witch has on her mask and her bag, ready for trick-or-treating.

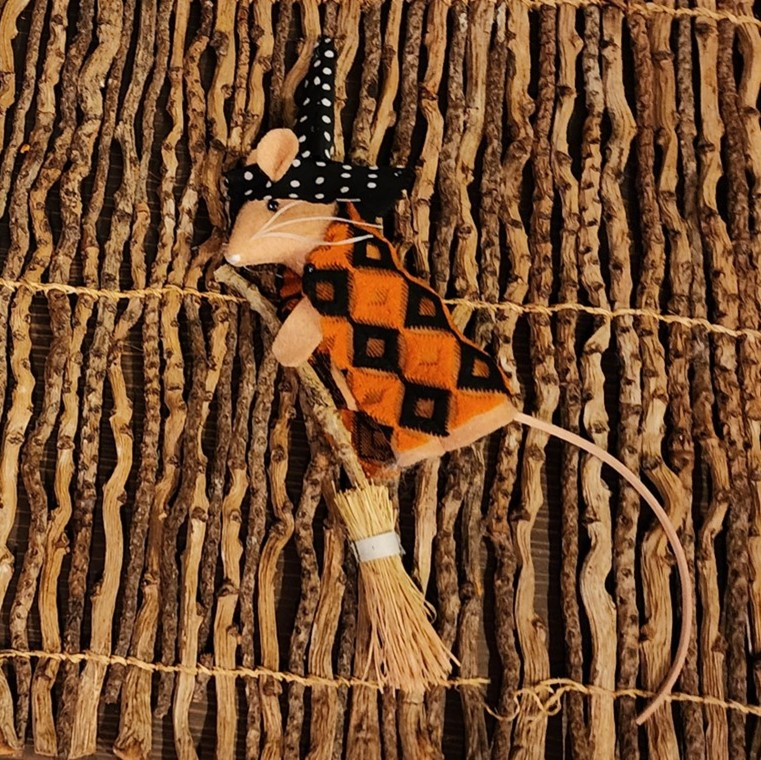
…and this little one is in traditional Halloween colors, ready to fly off on her broomstick for some holiday fun.

If you make a little witch, I love to see it!

3 Ways to Harness the Power of the V&A Digital Collections: Infinite Inspiration? Quite Possibly!

Now you can dive into the deep pool of the Victoria and Albert Museum’s online collections and own this superpower whenever you want a spark of inspiration.

If you’ve ever visited the museum in person, you already know the pleasure of browsing around the “family of art, design and performance museums, where everyone is invited to enjoy the power of creativity.” If you haven’t yet had the pleasure, you won’t regret the time invested in beginning to explore the V&A Digital Collections–inspiration at your fingertips.

This post will arm you with the basics of how to bring this intense treasure chest of art, craft and culture to your desktop or phone.

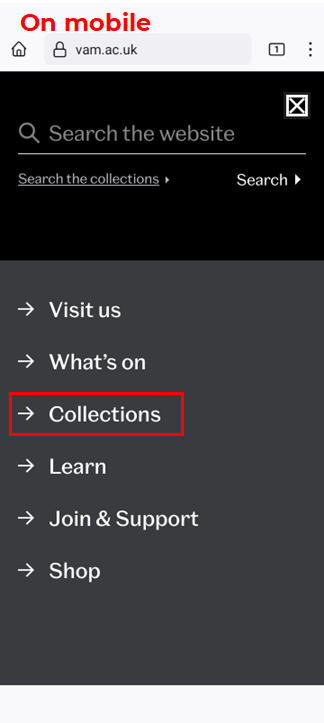
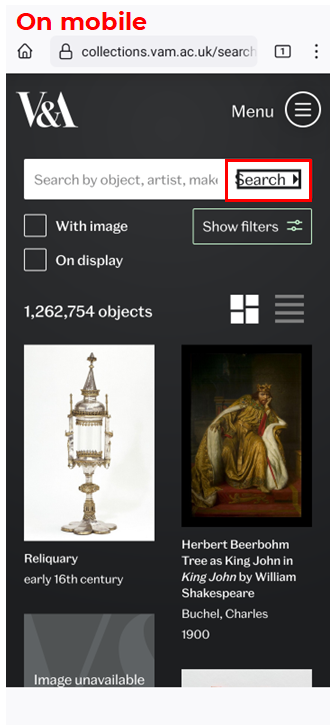
It all starts with the home page at vam.ac.uk. At the time of this writing, the Diva exhibition is making the home page navigation a bit hard to read, but you can find the Collections button in the top navigation bar, or in the three-bar menu on mobile.

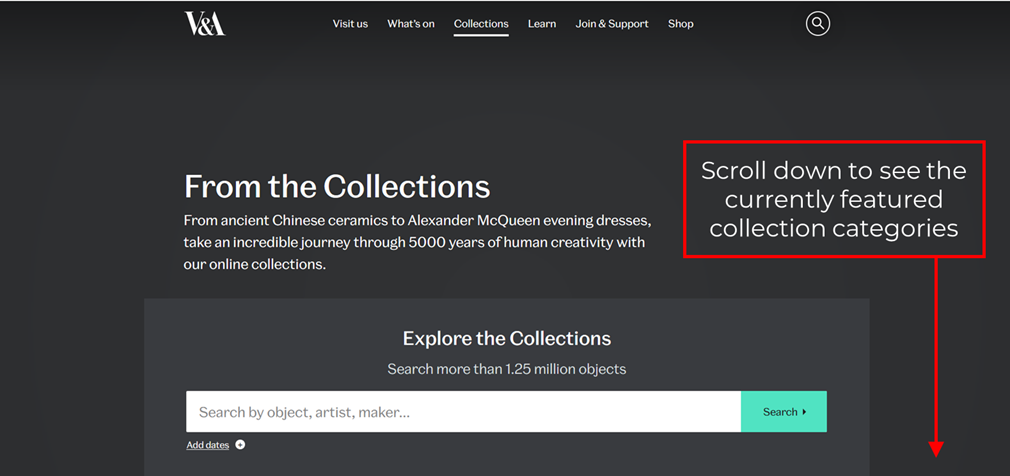
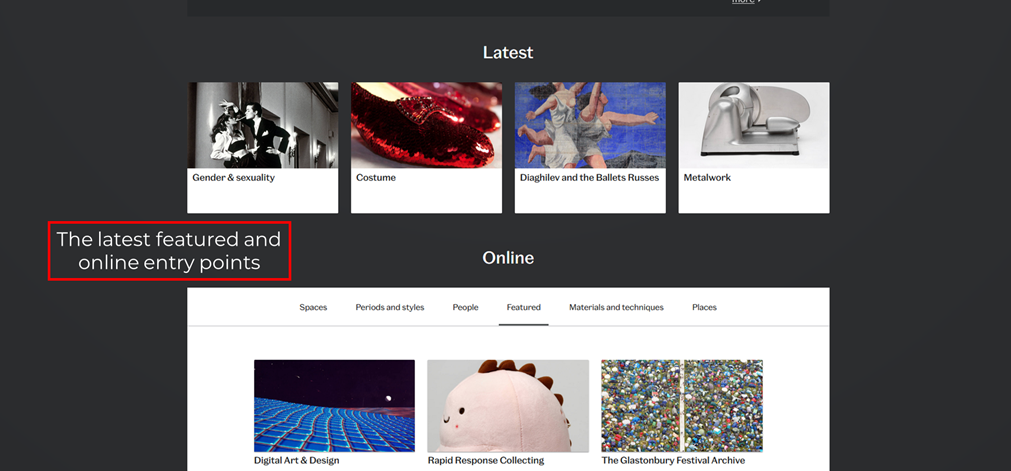
The Collections button will take you to the main Collections page. Scroll down to see currently featured categories.

There are 2 main ways to proceed from here: via the search function or using filters.

1 – Using the Search function

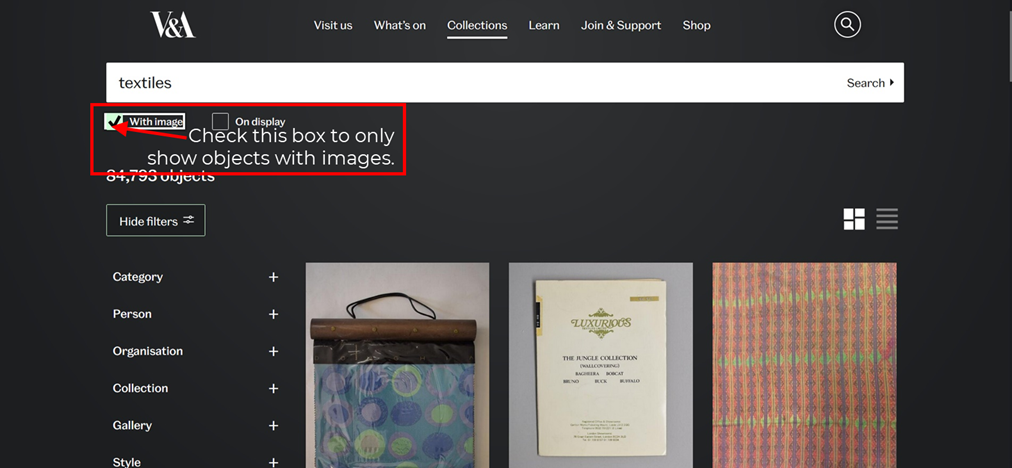
Let’s start by going back up into the search bar and entering a topic of interest. As a fabric geek, I’ll look for textiles.

That’s a pretty broad search term. I can see by the text below the search box that I’ve chosen to look for a category defined in the system. To further focus your search, you could add additional keywords to your search term.

But as an example, let’s follow this path to the endpoint. The next option will be whether you want all the results, see only objects currently on display, or narrow choices to only show the objects that have images. That’s the one I normally choose.

Now I can visually scroll through the objects in the collection.

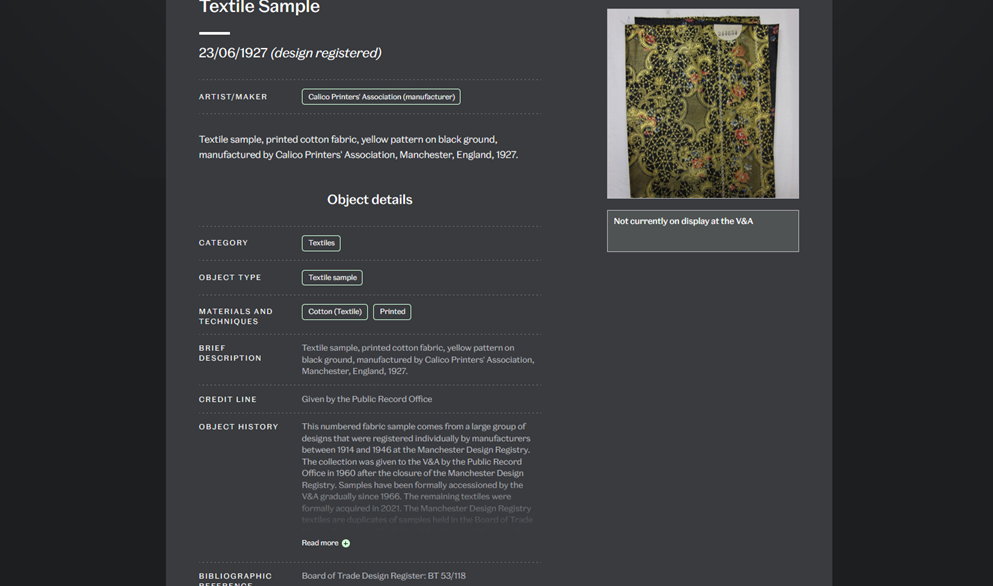
The brief label information displays the fabric’s date and manufacturer. Clicking on the image brings up the swatch with full details about this swatch visible by scrolling down the page.

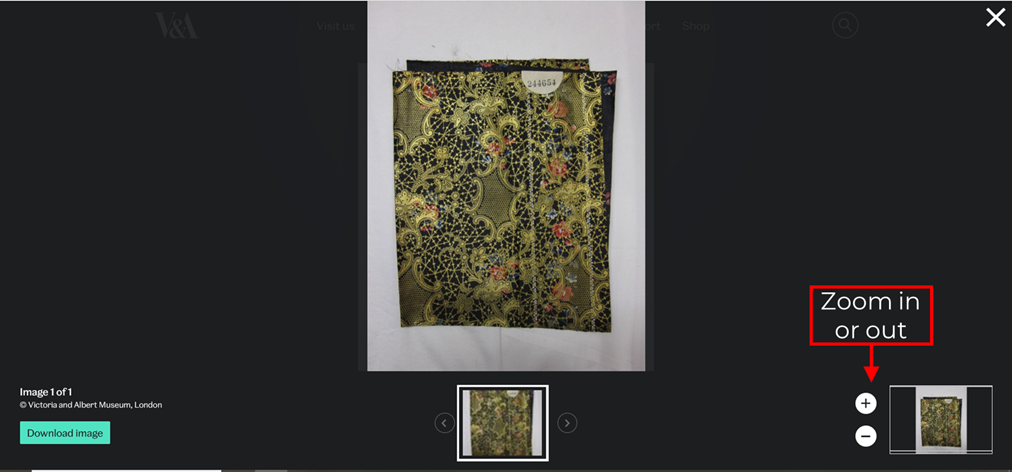
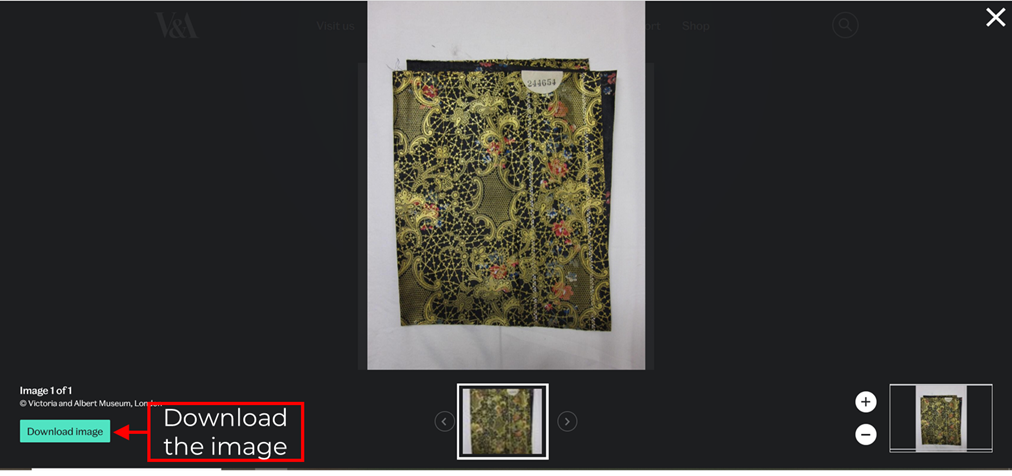
To look at the object more closely, scroll back up to the top of the object page to use the + or – controls to zoom in or out. On mobile, you’ll need to click the object in order to zoom in and out or download.

Here’s the enlarged detail:

At any level of detail, you can choose to download an image.

You’ll be able to see the exact terms of use for images in the collection and give your agreement. If the image requires licensing, the button will say “License image” instead of download, and the resulting popup will include instructions on how to proceed.

Now that you’ve seen the basics of using the Search tool, it’s time for the other powerful way to access objects in the collection: using the filter options in the left navigation rail.

2 – Browsing with filters.

Scroll back up to the top of the page and click the Collections tab. Click the Search button with nothing in the Search window.

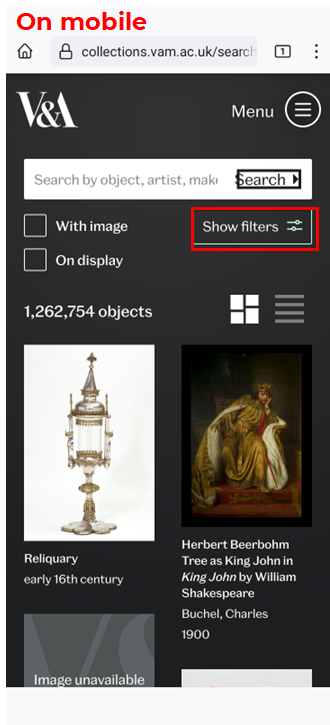
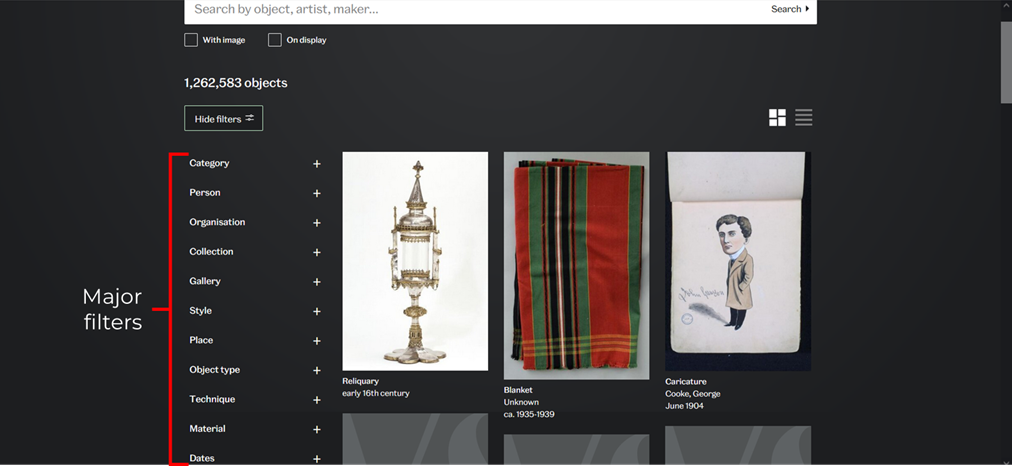
…which will result in offering you all the objects in the collections, with a list of the filters you can use in the left navigation bar. On mobile, click “Show filters” in the top right to bring up this list.

Over a million objects in the collection! The + (plus sign) to the right of each filter will pull up a list of options.

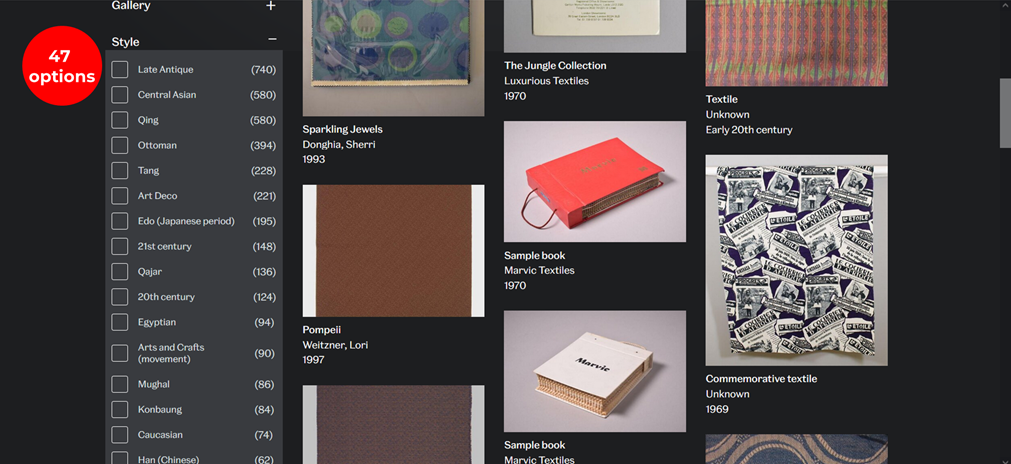
The style filter has 47 options, for example. And you can choose multiple filters to refine what you’d like to see.

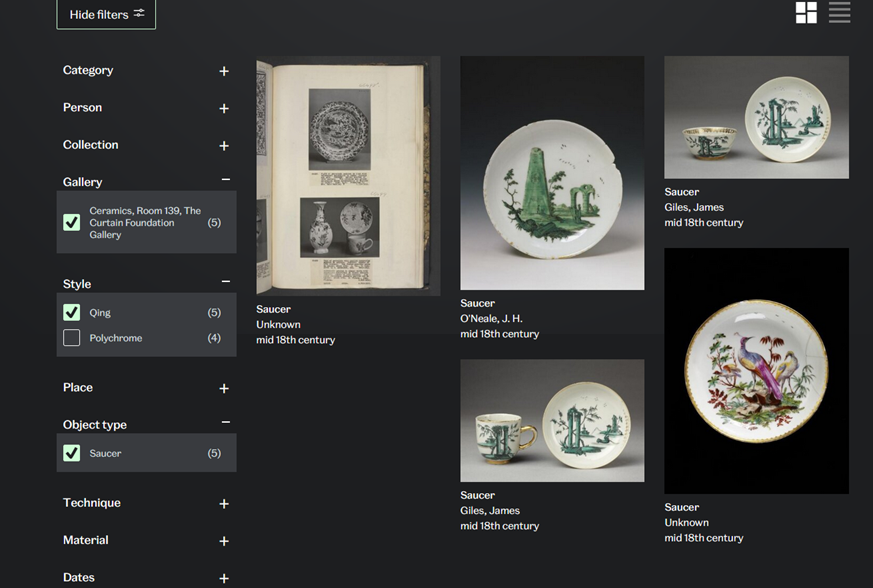
This result has 3 filters applied to show only Qing dynasty saucers from Ceramics Room 139, The Curtain Foundation Gallery:

You can see how powerful the filters can be.

The third way to access the digital collections is to combine methods 1 and 2.

3 – Combining search and filters

It’s straightforward–just start with a search term and then choose the filters you want to apply to the result.

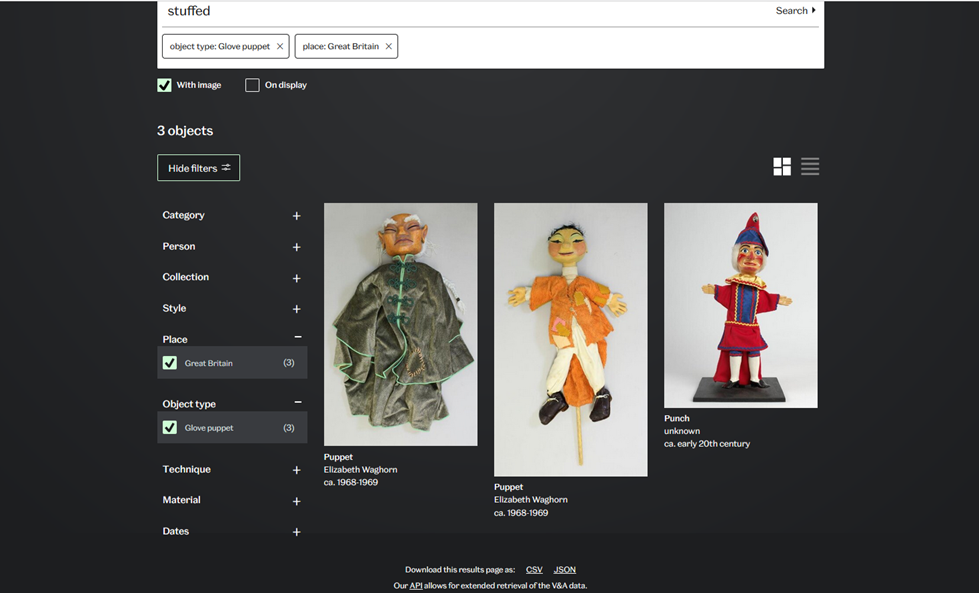
Here, I started with a search for “stuffed” and then applied filters for glove puppets from Great Britain:

So that’s all there is to it. Easy, right? Three powerful ways to get into the digital collections and find treasures to spark your creativity–I hope you’ll try them. If you’re interested in learning more about the kind of thinking and planning that goes on behind the scenes in continuing efforts to make the vast collection accessible, here’s a great read.

Please let me know if you have any special objects to share, or other museums whose digital collections you appreciate. Happy hunting!